


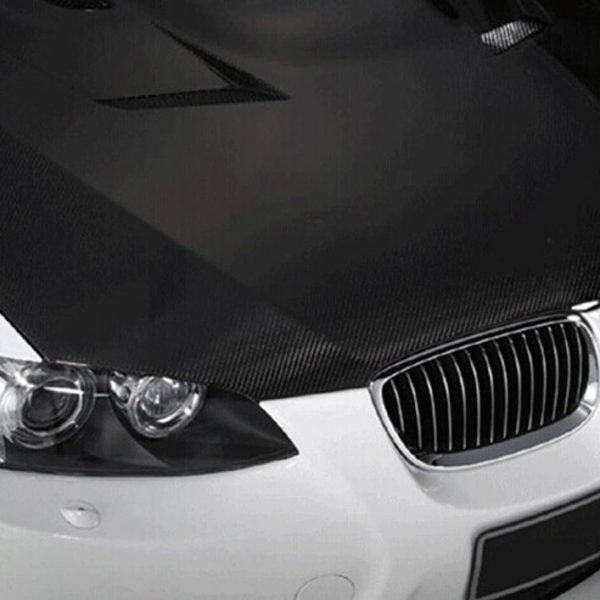
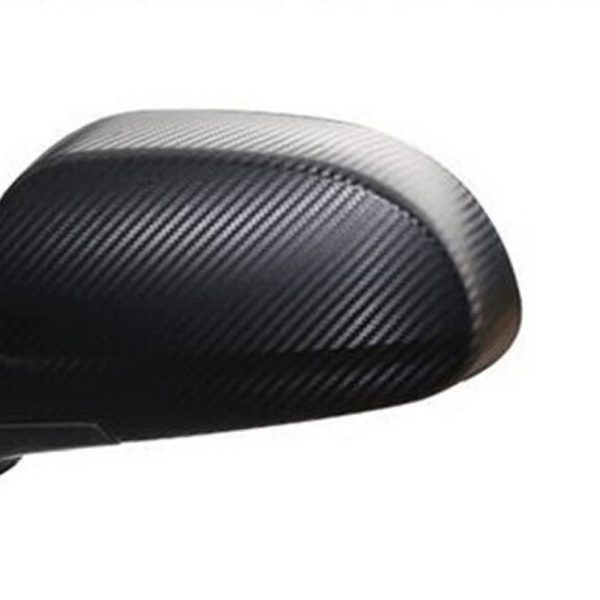

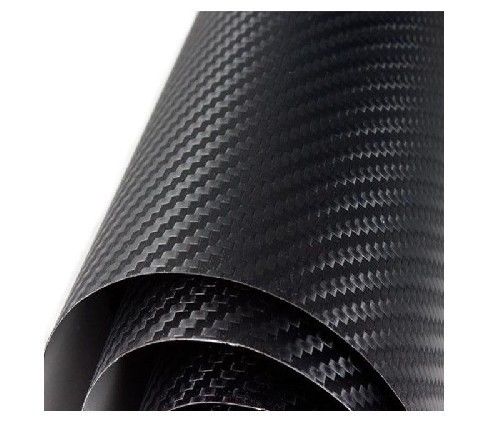


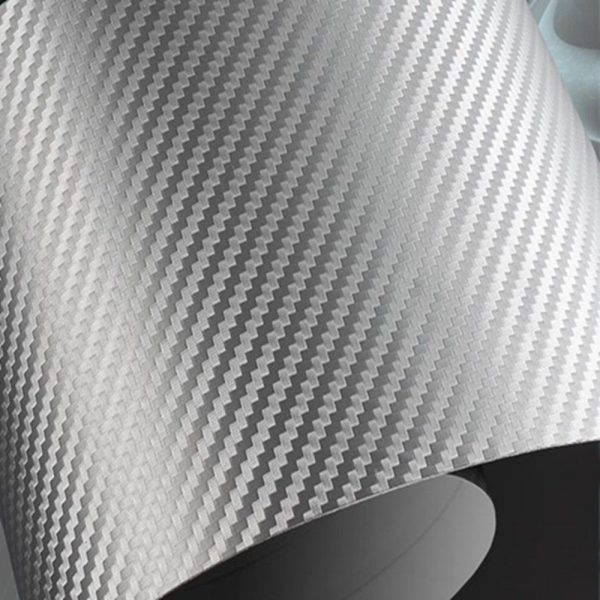
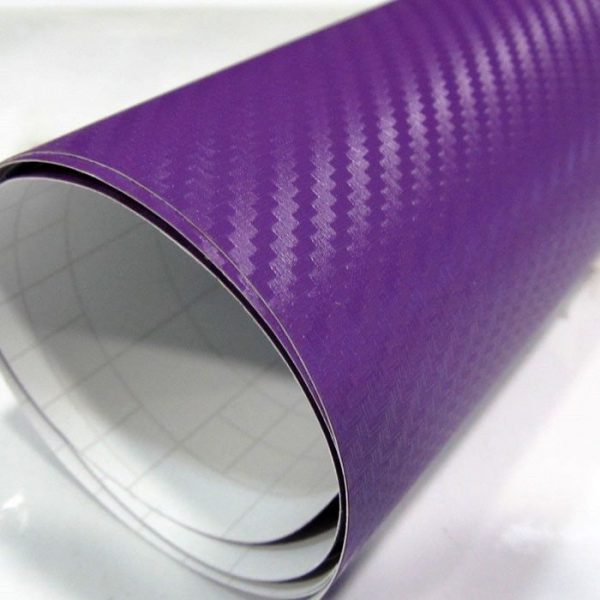

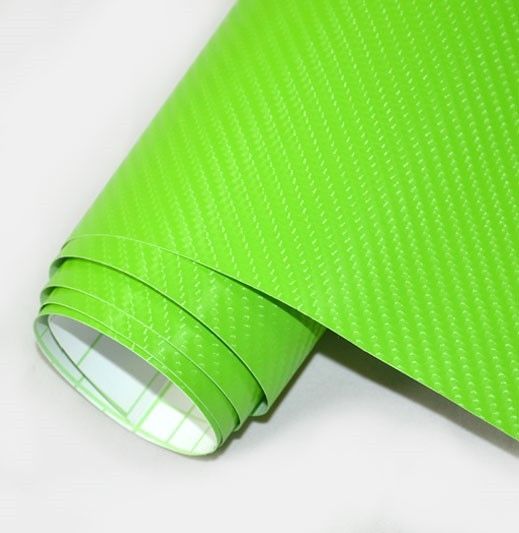
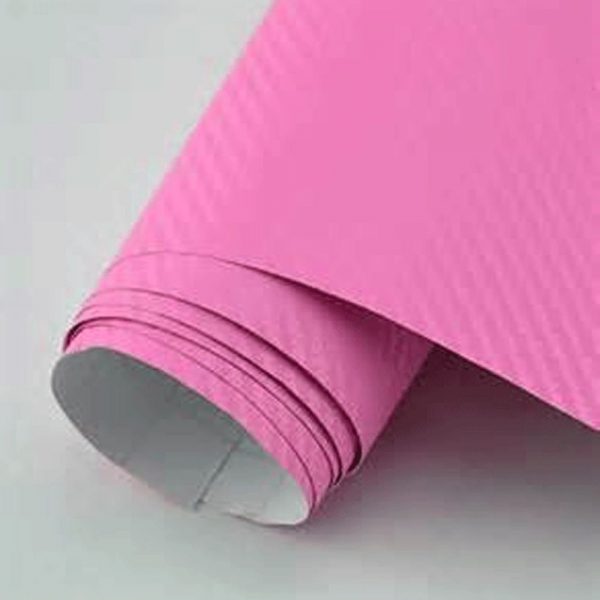
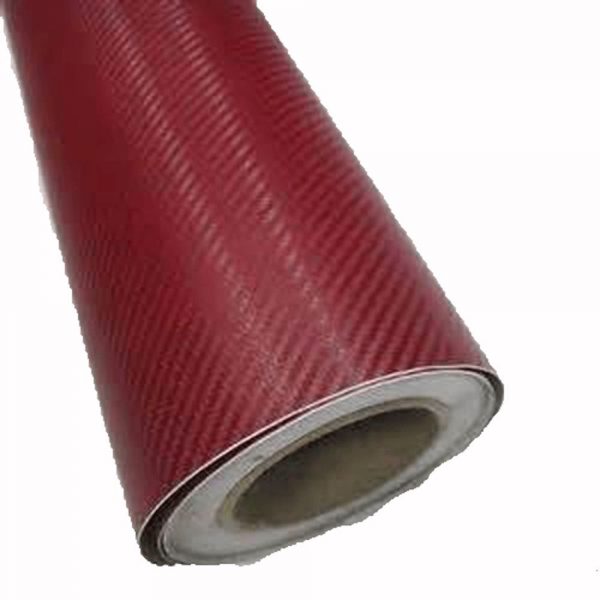
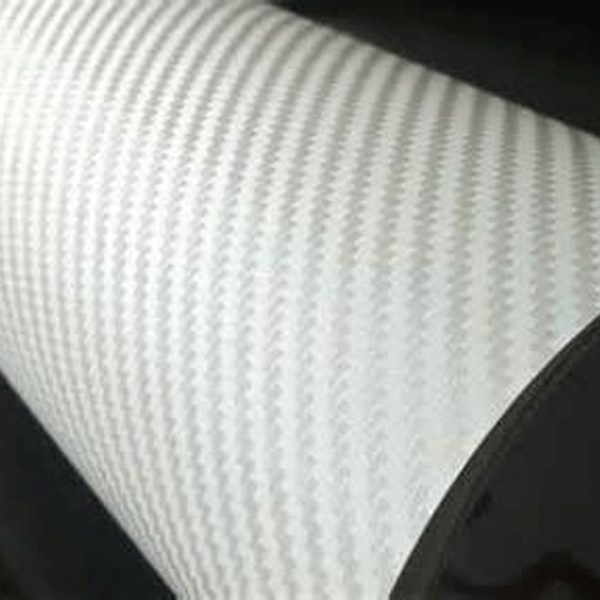


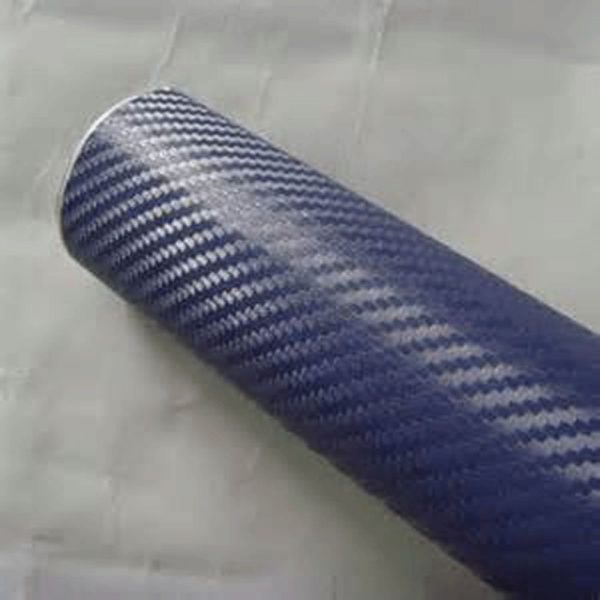


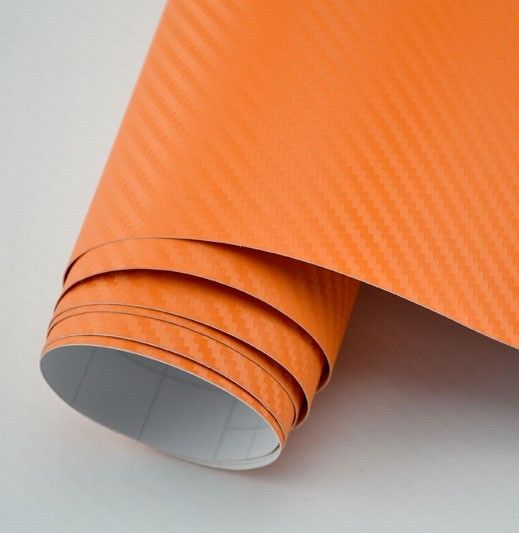


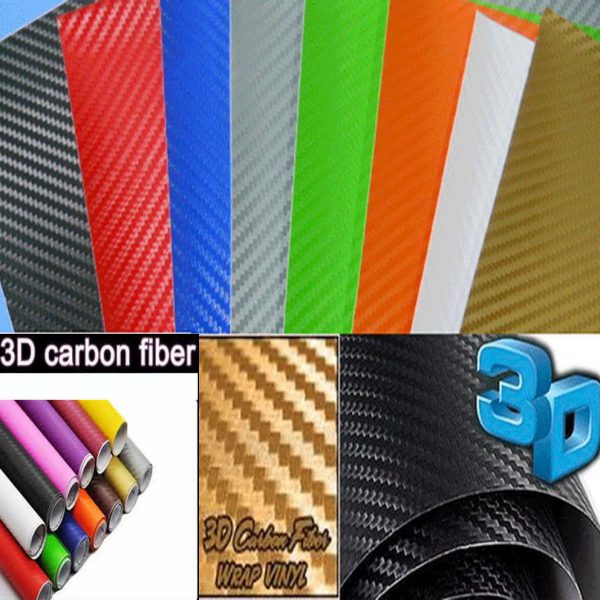
3D Carbon Fiber Vinyl Wrap Sticker 12″ x 60″ Top Grade Bubble Free Air Release

|
12″ X 60″ (1ft. X 5ft.)Carbon Fiber Vinyl 3D
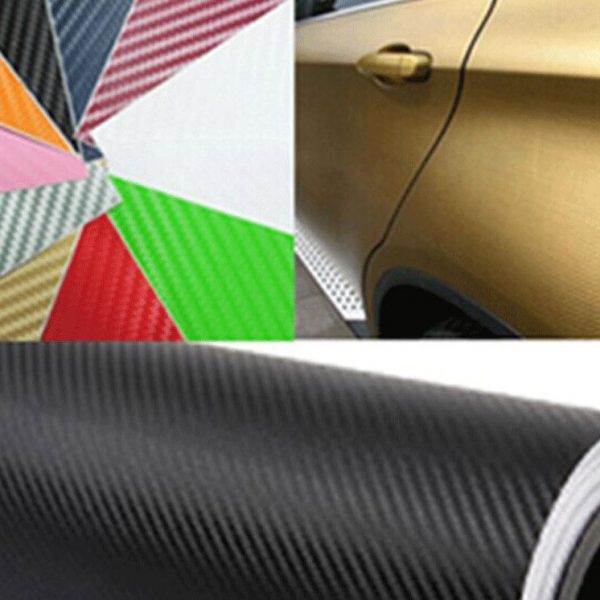
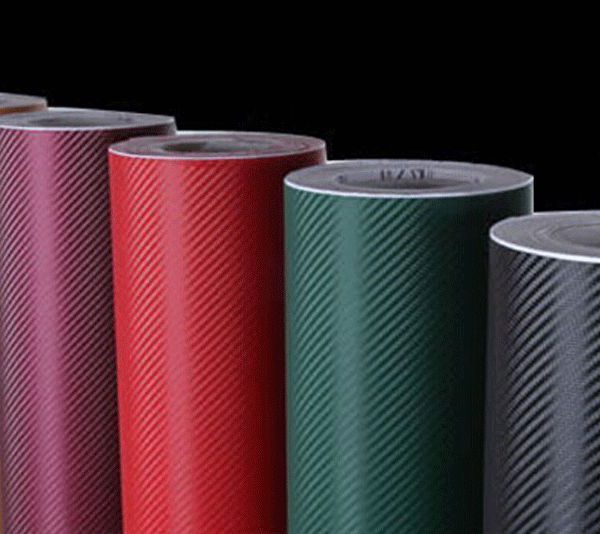
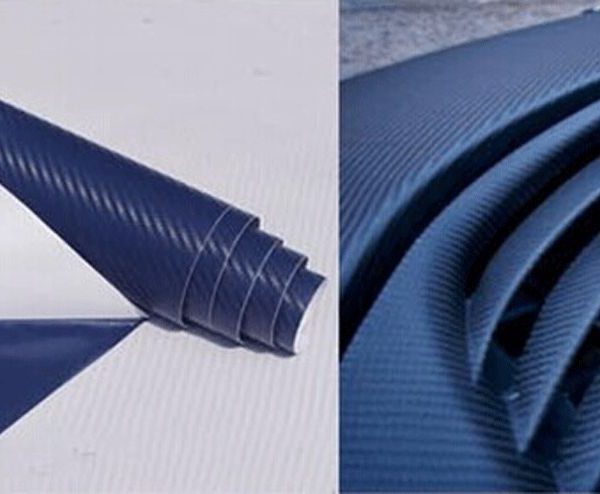
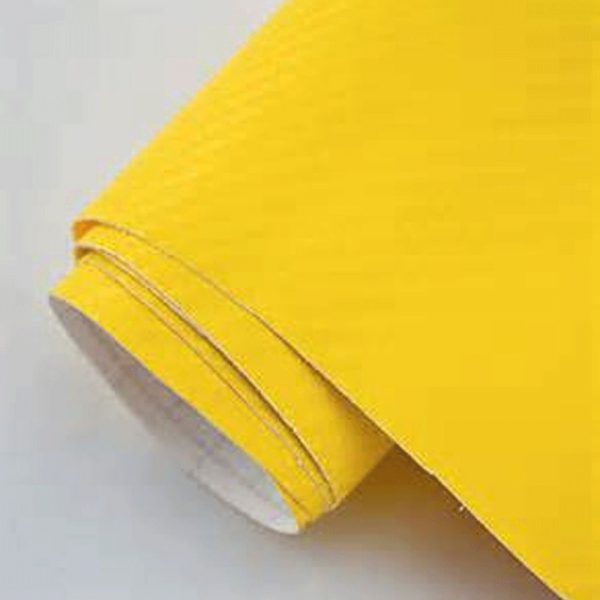
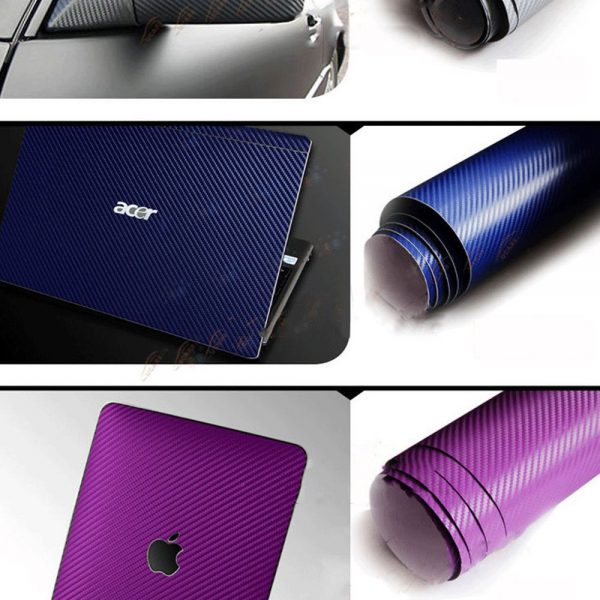
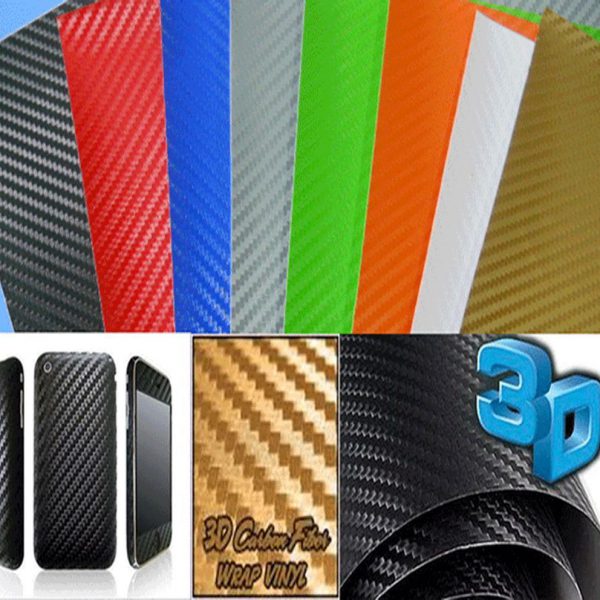
Biggest Selection on Ebay.. Color: You Choose Back up Top from: Black, Red, Gold, Silver, Blue, Orange, Purple, Green, Pink, Yellow, White, & Burgundy Huge Sale this Weekend Only, get it before the Price goes up
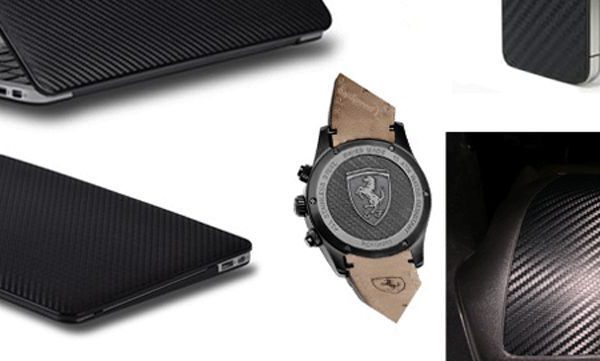
We Recommend Looking Up a Instructional Video on How to Apply Carbon Fiber Vinyl for best results, We have a few tips below as well.
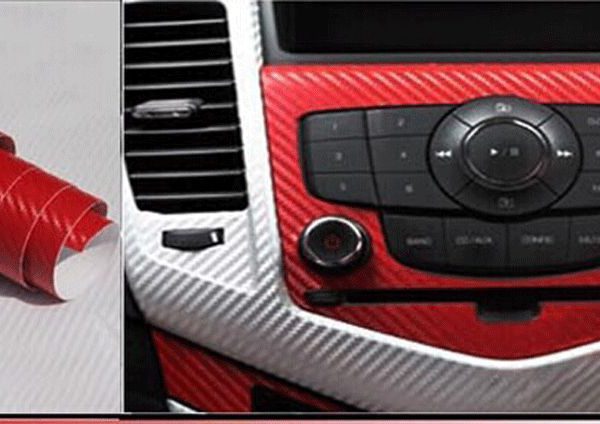
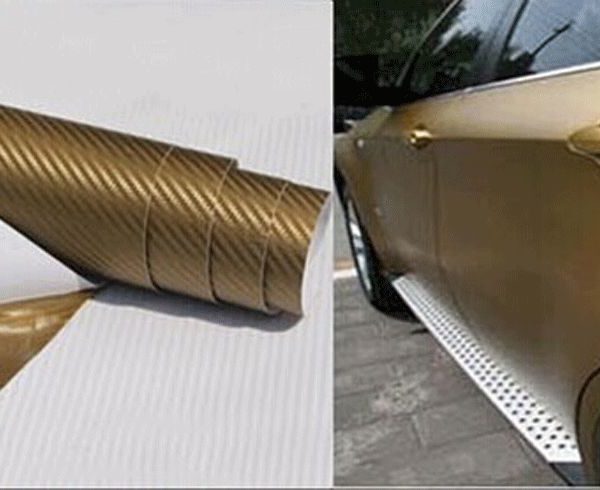
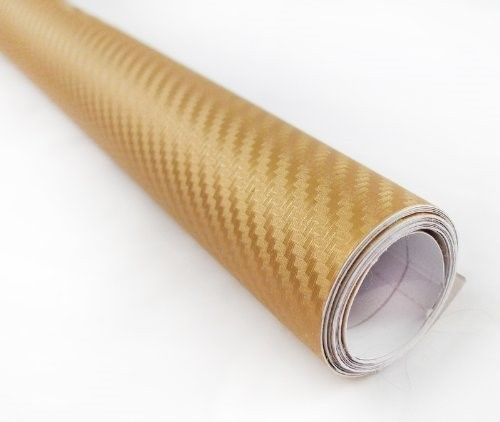
auto vinyl wrap 3d carbon fiber film
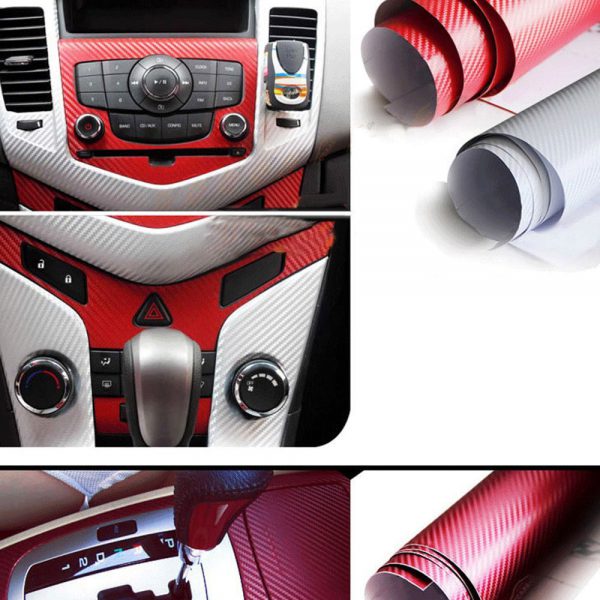
Thickness 0.18mm Heat resistance -50°C to +200°C Stretch rate 33+ pascal Mask thickness before embossing 11.5c Glue material Imported removable glue Glue thickness 0.03mm Glue weight 30g/m2±2gm2 Gram weight of release paper 140gsm embossing paper Thickness of release paper 0.15-0.16mm Stand up against water, dirt, grease, salt, weak acids oil Durability period Indoor 7-8 years; outdoor: 5-6 years Compatibility Die cutting,car decoration,architectural decoration These are instructions for how to wrap your automotive interior with carbon fiber vinyl. I have done this on a number of cars, and the technique can be applied to just about anything, some people even wrap their hood or trunk lid with this stuff. Materials/Tools needed: -carbon fiber vinyl -Scissors -X-acto knife or razor blade -Measuring tape -Plastic card for smoothing out bubbles (an old credit card will work, but it helps to smooth the edges a little) -Heat gun (hair dryer will work, but an adjustable heat gun is preferred) Step 1 Measure the trim Measure the trim as best you can leaving at least a half inch excess on each side of Step 2 Remove the Trim The “best” way to do this is to completely remove any trim from the Step 3 Applying The Vinyl Once you’ve cut all the pieces you need, start by removing the backing Once you’ve got the initial alignment done, you can start working it To wrap around contours, heat the vinyl a little until it is soft, then It helps at this point to notch the corners of the vinyl where the trim Make sure to use the heat gun when you fold the vinyl over to the backside, and it should hold extremely well once it cools. Step 4 Reinstall Trim Once you’ve wrapped all the trim, you can go ahead and reinstall it. If
|
| color | Black, Blue, Buguny / Dark Red, Gold, Green, Orange, Pink, Purple, Red, Silver, White, Yellow |
|---|
Related Products


Scarf Lady Red Vintage Women Long Soft Cotton Voile Print Scarves Shawl Wrap
1 Scarf Women Lady Winter Warm Red Vintage Long Soft Cotton Voile Print Scarves Shawl Pashmina Bohemian Wrap Your Choice between Red or Blue.. Features: 100% Brand New & High Quality Material: cotton Color: as picture Size(L*W): Approx 165cm * 85cm Soft, Breathable, Skin-friendly Package Include: 1 pcs Fashion Scarf


Home Security Alarm System Wireless Door 2 Window Sensors Programmable Key Pad
1 Home Security Alarm System w/ Panic Button, Door Alarm and Set of 2 Window Sensors Protect your Door & Windows. Set includes 1 magnetic sensor door alarm, programmable key pad and tow magnetic sensor window alarms. Instantly alerts you when door or windows have been opened with a 105 decible alarm sound. 3 sound settings. […]

Auto Truck Car Acrylic FOAM TAPE Adhesive 3m x 20mm Double Sided Attachment NEW
1 Auto Truck Car Acrylic Foam Double Sided Attachment Tape Adhesive 3m x 20mm (Approx. 9 feet 10″ inches Long X 3/4″ inch Wide) This Tape is used for the attachment of a wide variety of automotive exterior and interior trim including body side moldings, cladding’s, rock panel trim, wheel flares, bumper trim and most […]

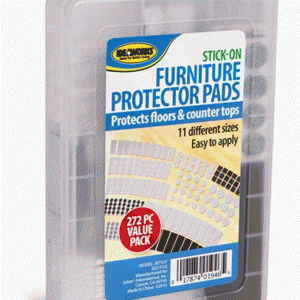
Furniture Pads Self Adhesive Felt Rubber/Foam Floor Scratch Protector 272 Pcs
1 Case of 272PC Furniture Protector Stick On Felt & Rubber Foam PADSBiggest set and Best Price on eBay.. Protects floors & counter tops. 11 different sizes. Strong stick-on adhesive. Easy to apply. Value pack. Comes packed in a plastic storage case.These Felt & Rubber/Foam protection pads are perfect for protecting floors and house […]
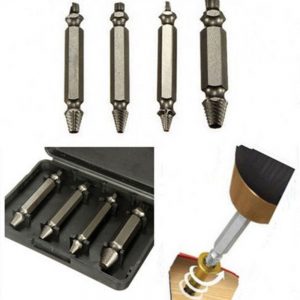
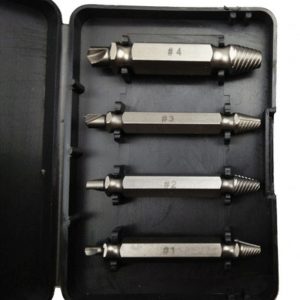
4pc Broken Bolt Damage Screw Remover Extractor Drill Bits Easy Out Stud Reverse
4pc Broken Bolt Screw Remover Extractor EZ Easy Out Stud Reverse Thread Remove broken screw in the wood, a head drill wood screw hole firstly, then use another head take screws. If you’ve ever stripped a screw or broken off the head of a bolt, you know how frustrating that can be. Well, not anymore. […]
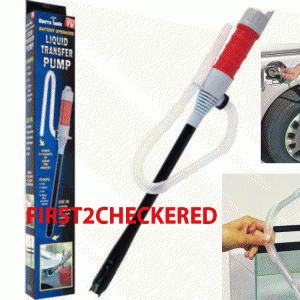
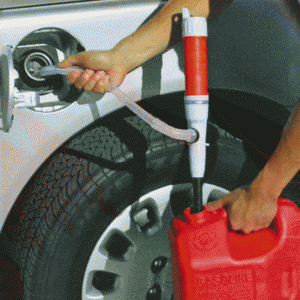
Liquid Transfer Siphon Pump Gas Oil Water Fish Tank Battery Powered Aquarium NEW
1 Battery Powered Liquid Transfer Siphon Pump Gas Oil Water Fish Tank Pumps gas, water, oil and other Non corrosive liquids. Pumps 5-6 quarts of liquid per minute. Ideal for garage, aquariums, basements, bathroom, shop & yard. Make and Ideal Choice when standard power is unavailable.. Can pump Gas, Water, Oil, Other Non Corrosive Liquids.. Use […]


3/4 4/4 Height Violin Shoulder RestVand Angle Fully Adjustable Black NEW
1 Adjustable Universal Type Violin Shoulder Rest Plastic EVA Padded for 3/4 & 4/4 Fiddle Violin Features: Universal type Violin shoulder rest for 3/4 4/4 size violin. Plastic shoulder rest and EVA foam pad, exquisite and padded. You can adjust the angle of the claws to match your need better. Soft foam pad eliminates the […]

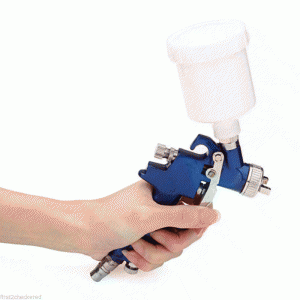
Mini HVLP Air Spray Gun Auto Car Detail Touch Up Paint Sprayer Gravity Repair
Mini HVLP Spray Gun Touch Up Gravity Feed Low Air Pressure With High Atomisation, precise-machined. Well Balanced, Handy and Light weight in construction.Non-Bleeder type, gravity Feed and external mix. Die Cast aluminum alloy Gun Bode with 2 Step trigger control.Self Centering Chrome-molybdenum steel nozzle.Spray width and Fluid Adjustable.Plastic Cup with throttle strainer.Suitable for Light Material […]


500pcs Fish Hooks 10 Sizes Fishing Black Silver Sharpened With Box Quality kit
500 Top Quality Fishing Hooks with Plastic boxPromo sale on first 20.. get them before price goes up..Color: Black Sliver CarbonPlastic Box Hooks Length:From 1 Cm to 2.5 Cm,Please Make Sure that the Sizes Before Biding.Position:LakeColor:Black Sliver CarbonMaterial: iron Net weight:90gType:Barbed HookGolden:Sea FishingPlace of Origin:China (Mainland)Model Number:3-12Hooks Sharp 3#-12# Top Quality Fishing Hooks 500Pcs In 1 Set1 […]